Setting up WildFly Elytron on Linux & WSL
This page will guide you through the steps needed to set up a development environment for WildFly Elytron on Linux or the Windows Subsystem for Linux (WSL). For WSL developers, all commands should be entered into the WSL terminal (i.e. not Command Prompt, PowerShell, or Git Bash).
Installing Java
-
First, let’s check if you already have Java installed.
-
Open a terminal and run
java --version. -
If the output shows a version number, check to make sure it is Java 11 (e.g., "11.0.15.1"). If so, Java 11 is already installed and you can jump to the [installing-maven] section. If the output is not Java 11, or if the output is
command not found: javaor a similar message indicating you do not have Java installed, then continue with the following steps.
-
-
It is easiest to install Java on Linux using the preferred package manager of your Linux distribution. Here are some examples of how to install Java on common Linux distributions:
-
Ubuntu:
sudo apt-get install openjdk-11-jdk -
Fedora:
sudo dnf install java-11-openjdk-devel -
Arch:
sudo pacman -S jdk11-openjdk
-
-
Next, configure the default JVM version for your system:
-
Ubuntu:
sudo update-alternatives --config java -
Fedora:
sudo alternatives --config java -
Arch:
archlinux-java set java-11-openjdk
-
-
Configure JAVA_HOME and PATH environment variables for Java (or use a temporary configuration):
-
Open the configuration file for your shell, which you can identify by typing
echo $0. If the response isbash, open the file ~/.bashrc, and if it issh, edit ~/.profile. You can look up config files for other shells by searching the name of the shell, followed by "config file" (ex. "zsh config file").-
WSL users: WSL doesn’t automatically create these files, so you will need to create it. For example, if your shell is Bash, create the config file with
touch ~/.bashrc.
-
-
Go to the end of the config file, and add the following lines:
export JAVA_HOME=$(readlink -f /usr/bin/java | sed "s:bin/java::") export PATH=$JAVA_HOME/bin:$PATH -
Run
source <config file>, substituting in your config file, to load the changes into the terminal.
-
-
Now run
java --versionagain. You should now successfully see the Java 11 version that was installed.
Installing Maven
-
First, let’s check if you already have Maven installed.
-
Open a terminal, and run
mvn -v. -
If the output shows a version number, Maven is already installed and you can jump to the [installing-git] section. If you get
command not found: mvnor a similar message indicating you do not have maven installed, then continue with the following steps.
-
-
Either install Maven with your package manager, or go to this page and download the latest Binary zip archive (e.g,
apache-maven-3.8.6-bin.zip).-
Package manager:
-
Ubuntu:
sudo apt-get install maven -
Fedora:
sudo dnf install maven -
Arch:
sudo pacman -S maven
-
-
Manual installation:
-
Extract the distribution archive in any directory:
unzip apache-maven-3.8.6-bin.zip -
Add the following to the end of the configuration file for your shell (or use a temporary configuration):
export PATH=<path to Maven folder>/apache-maven-3.8.6/bin:$PATH -
Run
source <config file>, substituting in your config file, to load the changes into the terminal.
-
-
-
Now run
mvn -vagain. You should now successfully see the Maven version that was installed.
Installing Git
-
First, let’s check if you already have Git installed.
-
Open a terminal, and run
git --version. -
If the output shows a version number, Git is already installed and you can jump to the [cloning-wildfly-elytron] section. If you get
command not found: gitor a similar message indicating you do not have Git installed, then continue with the following steps.
-
-
It is easiest to install Git on Linux using the preferred package manager of your Linux distribution. Here are some examples of how to install Git on common Linux distributions:
-
Ubuntu:
sudo apt-get install git -
Fedora:
sudo dnf install git -
Arch:
sudo pacman -S git
-
-
Now run
git --versionagain. You should now successfully see the Git version that was installed. -
If you already had any IDEs open, close and reopen them now to load your changes.
Cloning WildFly Elytron
-
First, configure Git so that it can attribute your commits to you. Run the following commands in the terminal, substituting your own name and email:
git config --global user.email "<you@example.com>" git config --global user.name "<Your Name>" -
Next, you’ll need a GitHub account. If you don’t already have one, sign up for one at github.com. Otherwise, make sure you’re logged in.
-
Fork the WildFly Elytron project into your GitHub account by clicking on the "Fork" button at the top right.

-
Now go to your fork of the repository, the URL will be https://github.com/<USERNAME>/wildfly-elytron. Replace
<USERNAME>with your GitHub username. -
At this point, you can follow the GitHub guide for adding a new SSH key to your GitHub account to set up an SSH key so you can clone your repository.
-
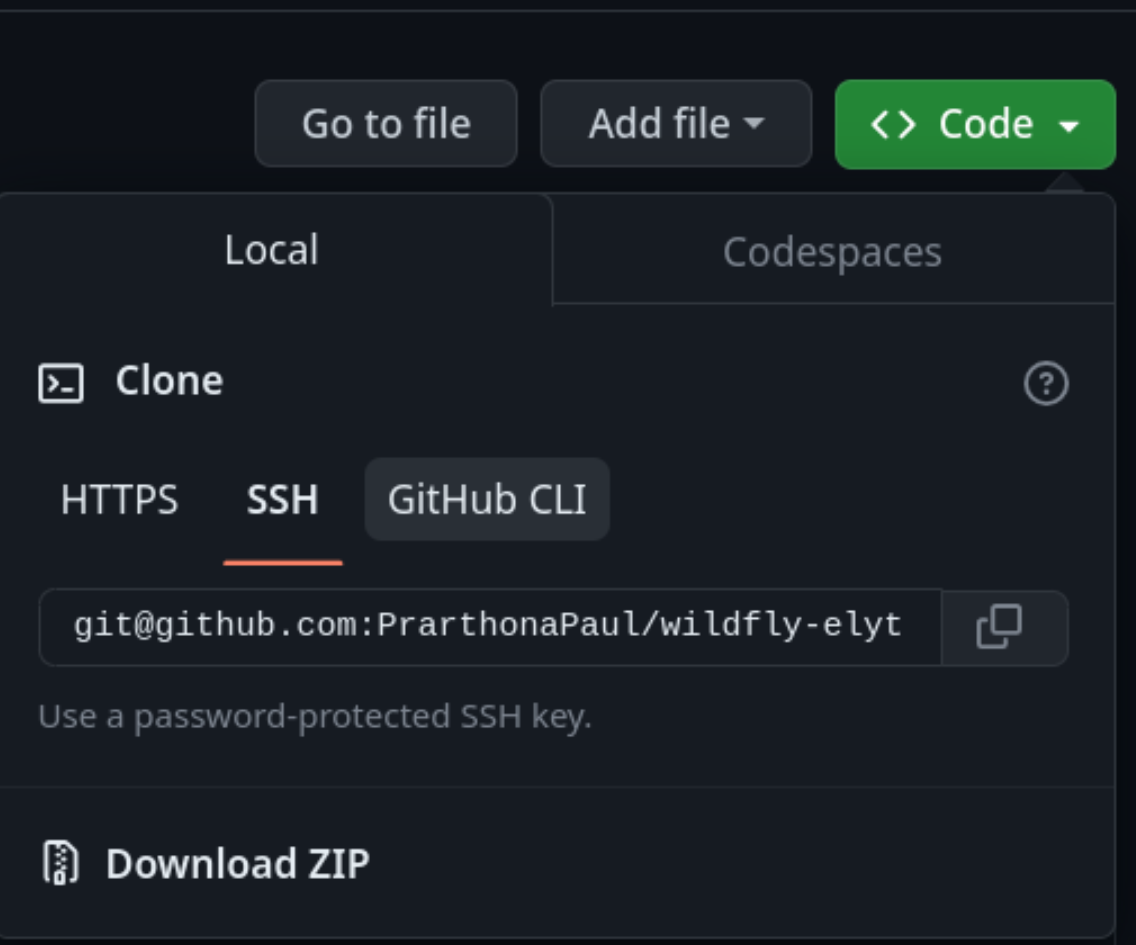
At the top right, you will see there is a green "Code" button. Click on that and choose the "SSH" tab. Click on the button next to the url to copy it.
-
Open your terminal and navigate to the directory where you want to clone this project. Then enter
git clone [URL]and replace[URL]with the URL you copied in step 6. Now you should see a directory calledwildfly-elytronthat contains the code for the WildFly Elytron project. -
Next, add a remote reference to upstream, for pulling future updates from the source repository. Execute the following command in the terminal:
cd wildfly-elytron
git remote add upstream https://github.com/wildfly-security/wildfly-elytron.git
Building WildFly Elytron
-
Open your terminal.
-
Navigate to the wildfly-elytron project directory and run
mvn clean install. This will build the project. -
Check out the Getting Started for Developers guide to learn more about the WildFly Elytron project and how to run tests.
Restoring Configuration
If you need to restore your original system configuration at some point, you can follow the steps here.